Installing a showerhead begins by identifying the head type and matching the threaded size. Turn off the water, remove the old unit, and clean the fixture threads. Hand-tighten the new showerhead, then snug it with a wrench without over-torquing. Check alignment and seals, restore water, and test all spray settings for consistent flow. If leaks appear, reseal or replace gaskets and inspect the fixture for long-term reliability. The next step reveals how to avoid common installation mistakes.
Identify Your Showerhead Type and Fit
Showerheads vary in connection size, spray settings, and mounting style, so identifying the type and fit begins with measuring the threaded connection and noting present mounting hardware. The process aims to identify compatibility, measure thread size, and assess install options. Consider water pressure impact, fixture compatibility, and corrosion resistance to ensure a durable choice. Accurate assessment enables confident, flexible installation decisions.
Remove the Old Head Without Leaks
To remove the old head without leaks, begin by turning off the shower supply and sealing the area to catch drips. Grasp the fixture body firmly, then rotate counterclockwise with steady pressure. Inspect for residue and wipe clean. Ensure proper leak prevention by checking the gasket. Confirm thread compatibility before proceeding to the next step.
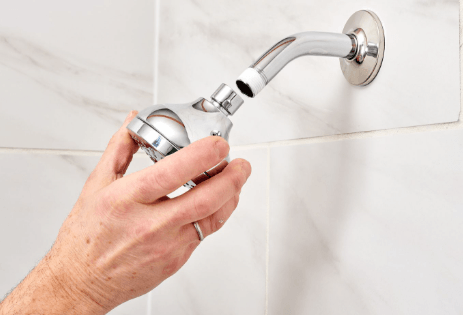
Install the New Showerhead for Steady Flow
Install the new showerhead with a steady, controlled approach to ensure even flow and a leak-free seal. The procedure emphasizes two word discussion ideas: plan, verify. Tighten fittings by hand first, then with a wrench—avoid over-torque. Align with plumbing basics: threads, sealant, and water supply shutoff. Check flow optimization by testing various spray patterns and confirming consistent output across settings.
Troubleshoot Common Issues and Maintenance
Common issues and routine maintenance are addressed by inspecting connections, evaluating spray patterns, and replacing worn components as needed.
The guidance emphasizes a practical maintenance schedule, documenting intervals for gasket checks and cartridge replacement.
A spray pattern comparison helps identify obstructions or wear.
Regular tests, timely resealing, and straightforward fixes reduce leaks and maintain consistent performance with minimal disruption to users’ freedom.
See also: How Crypto Affects the Banking Industry
Conclusion
This brief conclusion quietly signals success, with the task completed and the system restored to calm operation. Where tight turns once caused concern, a measured touch and careful alignment now foster steady flow and reliable performance. In time, minor adjustments may appear inevitable, yet the prudent approach—cleaning threads, resealing joints, and verifying seals—keeps the fixture singing in harmony. The result is a modest, dependable upgrade that invites consistent use and fewer interruptions.